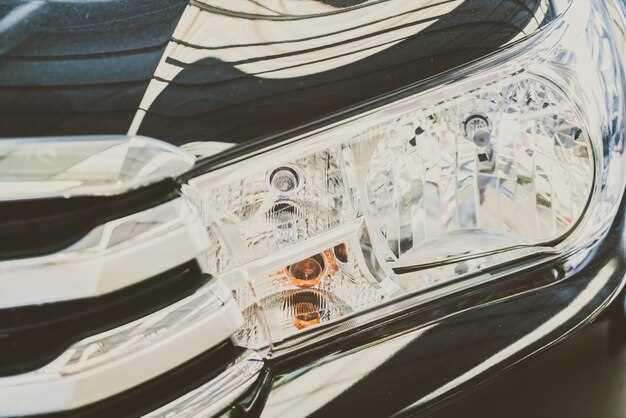
Over time, vehicle headlights can become cloudy and yellowed due to exposure to UV rays, road debris, and environmental pollutants. This degradation not only impacts the aesthetics of your vehicle but also significantly reduces nighttime visibility, posing a safety risk on the road. Fortunately, headlight restoration kits offer a practical and cost-effective solution to restore clarity and brightness to your headlights.
Choosing the right headlight restoration kit can be a daunting task given the plethora of options available on the market. In this article, we will explore the top-rated headlight restoration kits that deliver impressive results, ensuring your headlights are not only crystal clear but also safe for driving. Each kit is evaluated based on its ease of use, effectiveness, and value for money, making it easier for you to find the perfect option to suit your needs.
Investing in a quality headlight restoration kit not only enhances your vehicle’s appearance but also improves overall visibility at night, contributing to a safer driving experience. Read on to discover our top picks and how they can help you achieve bright, clear headlights once again.
Choosing the Right Kit for Different Headlight Materials

When selecting a headlight restoration kit, understanding the type of material used in your headlights is crucial for achieving optimal results. Most headlights are made from either polycarbonate or glass, and each material requires a different approach to restoration.
Polycarbonate headlights are prevalent in modern vehicles due to their lightweight and impact-resistant properties. However, they are prone to UV damage and oxidation, leading to cloudiness. For polycarbonate lenses, look for kits that include sanding pads and UV sealants. These kits typically contain multiple grits of sandpaper, compounds, and a protective coating, which help to remove oxidation and restore clarity effectively.
Glass headlights, on the other hand, are more durable and less susceptible to UV damage. However, they can still develop scratches and haziness over time. When dealing with glass headlights, it’s best to choose a kit that includes polishing compounds rather than sanding pads. Polishing compounds are effective at gently removing minor imperfections without damaging the glass. Some kits may also contain specialized applicators to ensure a smooth and even application.
For vehicles with both types of headlights, it is essential to assess each one individually and select the appropriate kit tailored to the specific material. Additionally, ensuring that the kit you choose has adequate instructions and all necessary components will enhance the restoration process and deliver professional results.
Ultimately, considering the material of your headlights will not only save you time but also enhance the longevity of the restoration, providing clearer visibility and improved safety on the road.
Step-by-Step Guide to Using Headlight Restoration Kits
Restoring your car headlights is a straightforward process if you follow a systematic approach. Begin by gathering the necessary materials from your headlight restoration kit, which typically includes sandpaper of various grits, polishing compound, a microfiber cloth, and a spray bottle with water.
Start by cleaning the headlights. Use soap and water to remove any dirt and grime from the lens surface. Ensure the area around the headlights is dry to avoid contamination during the restoration process.
Next, prepare the sandpaper. Most kits will guide you to use low-grit sandpaper (usually around 400-600 grit) initially. Dampen the sandpaper with water, then gently sand the headlight in a circular motion. Apply consistent pressure, making sure to cover the entire surface. This step removes the oxidized layer, which is crucial for restoring clarity.
Once the initial sanding is complete, switch to a higher grit sandpaper (around 800-1000 grit). Repeat the sanding process, ensuring to keep the surface wet. This finer grit smooths out the surface imperfections left from the lower grit sandpaper.
After sanding, rinse the headlights thoroughly with water to remove any sanding residue, then dry them with a clean microfiber cloth. Inspect the lens; if it appears cloudy, you may need to repeat the sanding process with the higher grit sandpaper.
The next step involves applying the polishing compound. Apply a small amount of the compound to a clean microfiber cloth and rub it onto the headlight in circular motions. Ensure an even application, which will help restore the shine and clarity of the lens.
After polishing, let the compound sit for a few minutes as per the instructions of the kit. Once the time has elapsed, buff the headlight with another clean microfiber cloth to bring out the shine and remove any excess product.
Finally, assess the results. If the headlights still appear hazy or dull, consider repeating the polishing process or trying additional steps as recommended in your kit. To protect your results, some kits include a protective sealant that can be applied as a final step.
Regular maintenance of your headlights will ensure they remain clear and bright. Following this guide will not only improve your visibility while driving but also enhance the overall appearance of your vehicle.
Comparing Performance and Longevity of Top Brands

When selecting a headlight restoration kit, it’s essential to consider both performance and longevity. The leading brands in the market offer varying levels of effectiveness and durability, making it crucial for consumers to understand the distinctions.
Meguiar’s Headlight Restoration Kit is widely recognized for its high-performance outcome. Utilizing a proprietary polishing compound and durable sealant, it not only restores clarity but also protects against future oxidation. Users often report retaining clear headlights for up to twelve months before noticing any decline in visibility.
3M Headlight Renewal Kit is another formidable option. Its easy-to-use sanding and polishing system allows for significant restoration of hazy headlights. The included UV sealant ensures prolonged protection. Many users note that their headlights maintain clarity for over a year, underscoring the effectiveness of the UV coating in preserving the restored appearance.
Headlight Restore by Sylvania stands out for its emphasis on simplicity and efficiency. The kit includes pre-mixed solutions that are easy to apply, making it a favorite among those seeking quick results. However, while it delivers impressive clarity immediately after application, some users have reported gradual yellowing sooner compared to its competitors, with optimal results lingering around six to eight months.
Blue Coral Headlight Restoration Kit offers a unique formula designed to address heavy oxidation effectively. While it excels in performance, particularly for severely dulled headlights, the longevity may vary; many customers report needing to reapply within six to nine months. This kit is ideal for challenging restoration jobs but may require more frequent maintenance.
In summary, while each of these brands delivers commendable performance in restoring headlight clarity, differences arise in their longevity. Meguiar’s and 3M generally provide better long-term results, while Sylvania and Blue Coral may necessitate more frequent applications. Choosing the right kit depends on individual needs, including the current condition of the headlights and the desired duration of the restoration effect.


